
Alright, let’s talk about diving into making brandy mash. It’s something I’ve wanted to get right for a while now, not just read about. So, I decided to finally roll up my sleeves and document how I actually did it this time around.
Getting the Fruit Ready
First things first, you gotta get your base. I went with apples this time, mostly because I got a good deal on a big batch from a local orchard. They weren’t all perfect looking, but for mashing, that doesn’t really matter much, does it? The key is ripeness and flavour.
So, the process started with washing. Lots of washing. You don’t want any dirt or random stuff ending up in your mash. After they were clean, I spent a good chunk of time chopping them up. Didn’t go crazy making them tiny, just small enough to break down easier. Removed the stems and any really bad spots, but left the cores in – some folks say it adds character, others don’t. I’m in the ‘leave ’em in’ camp for now.
The Mashing Part
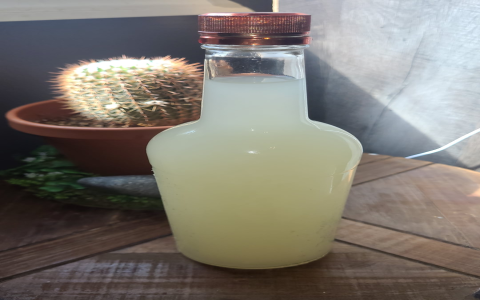
Once I had a mountain of chopped apples, it was time to mash ’em down. I don’t have a fancy fruit press or anything, so I used a sturdy sanitized bucket and a clean piece of timber I shaped into a basic masher. It’s hard work, let me tell you. Just kept pounding and squishing until it was mostly pulp and juice. Took longer than I thought!
Here’s roughly what went into my main fermentation bucket:
- Loads of crushed apples (filled the bucket about two-thirds)
- Filtered water (enough to get it looking like a thick slurry)
- Sugar – Now, this depends. I added some basic white sugar dissolved in warm water. Why? To bump up the potential alcohol. Some purists might scoff, but hey, it’s my batch.
- Yeast – Used a specific type meant for fruit wines/brandy. Didn’t just chuck it in dry; I rehydrated it first in some warm water like the packet said.
I gave it all a really good stir. You want that yeast mixed in everywhere to get things going.
Waiting and Watching
After mixing, I sealed the bucket with an airlock. This is super important. Lets the CO2 out from the yeast working, but stops oxygen and nasty bugs from getting in. Then, I moved the bucket to a corner in my basement where the temperature is pretty stable, not too hot, not too cold.
And then… you wait. For the first few days, things were bubbling away like crazy through the airlock. That’s a good sign! It means the yeast is happy and eating up those sugars. I checked on it daily, mostly just watching the airlock activity and making sure nothing looked weird (like mold).
The bubbling slowed down after about a week or so. I used my hydrometer to check the gravity. Basically, seeing how much sugar is left. You want that number to drop way down, meaning the sugar’s been converted to alcohol.
Next Steps
Once the fermentation was pretty much done (very little bubbling, stable low gravity reading), the mash was technically ready. Smelled pretty strong, quite appley with that boozy kick underneath.
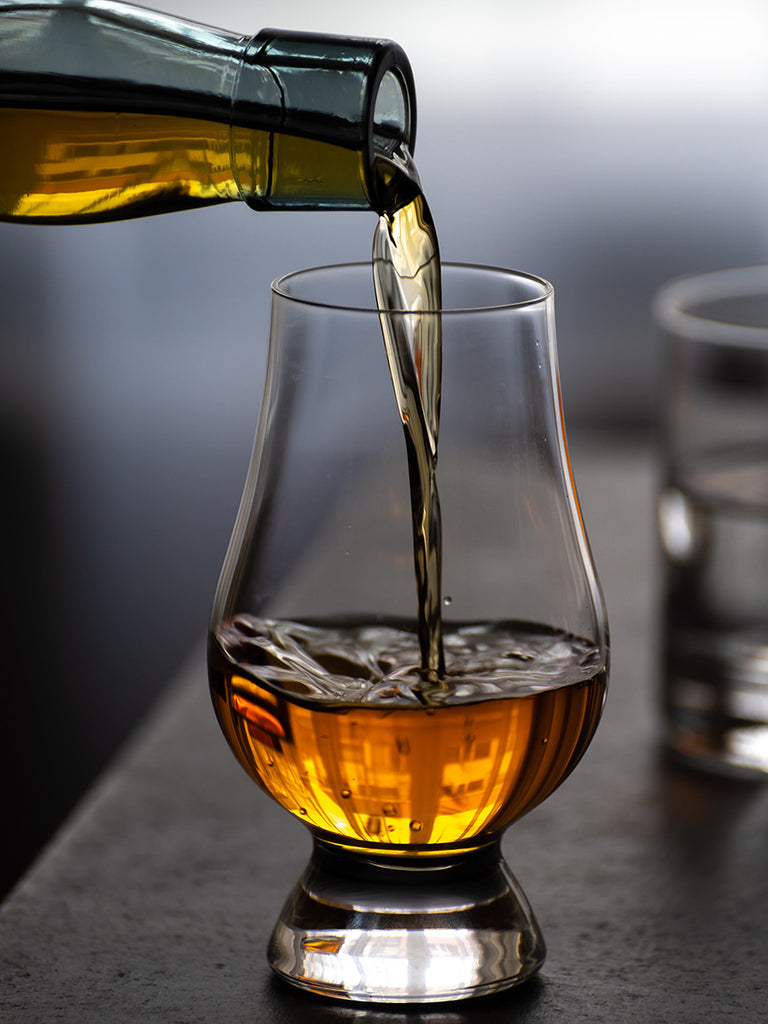
The next stage, of course, is distillation. That’s a whole other kettle of fish, requiring careful setup and attention. This mash I made is now waiting for that step. Getting the mash right is the foundation, though. If the mash is bad, the brandy won’t be good, simple as that.
It’s a process of patience, really. And a bit of experimentation. This batch feels promising. We’ll see how it turns out after it runs through the still. Definitely learned a few things just from this round of mashing.


