
Alright, so I finally got around to building that outdoor kitchen with a pizza oven I’ve been dreaming about for ages. Let me tell you, it was a journey!
Phase 1: Planning and Prep (aka the “what have I gotten myself into” stage)
- First, I spent weeks just sketching out designs. I wanted something functional, looked good, and most importantly, could house a proper pizza oven.
- Next, I measured my patio a million times. Seriously. Making sure I had enough space was key. Didn’t want a fire hazard right next to the house!
- Then came the permits. Ugh. Local codes are a pain, but gotta do it right. Took a while to get approved, but eventually, I got the green light.
- Finally, ordering materials! Lumber, concrete blocks, the pizza oven itself (more on that later), and a whole lot of other stuff. My garage looked like a home depot exploded.
Phase 2: Laying the Foundation (aka the “back-breaking labor” stage)
- Digging. Oh god, the digging. I swear, I hit every rock in a 5-mile radius. My back still hurts thinking about it.
- Pouring the concrete slab. This was tricky. I rented a concrete mixer (best decision ever) and got a buddy to help. We managed to get it level, which was a minor miracle.
- Building the base with concrete blocks. This was surprisingly satisfying. Mortar, level, repeat. Slowly but surely, it started to look like something.
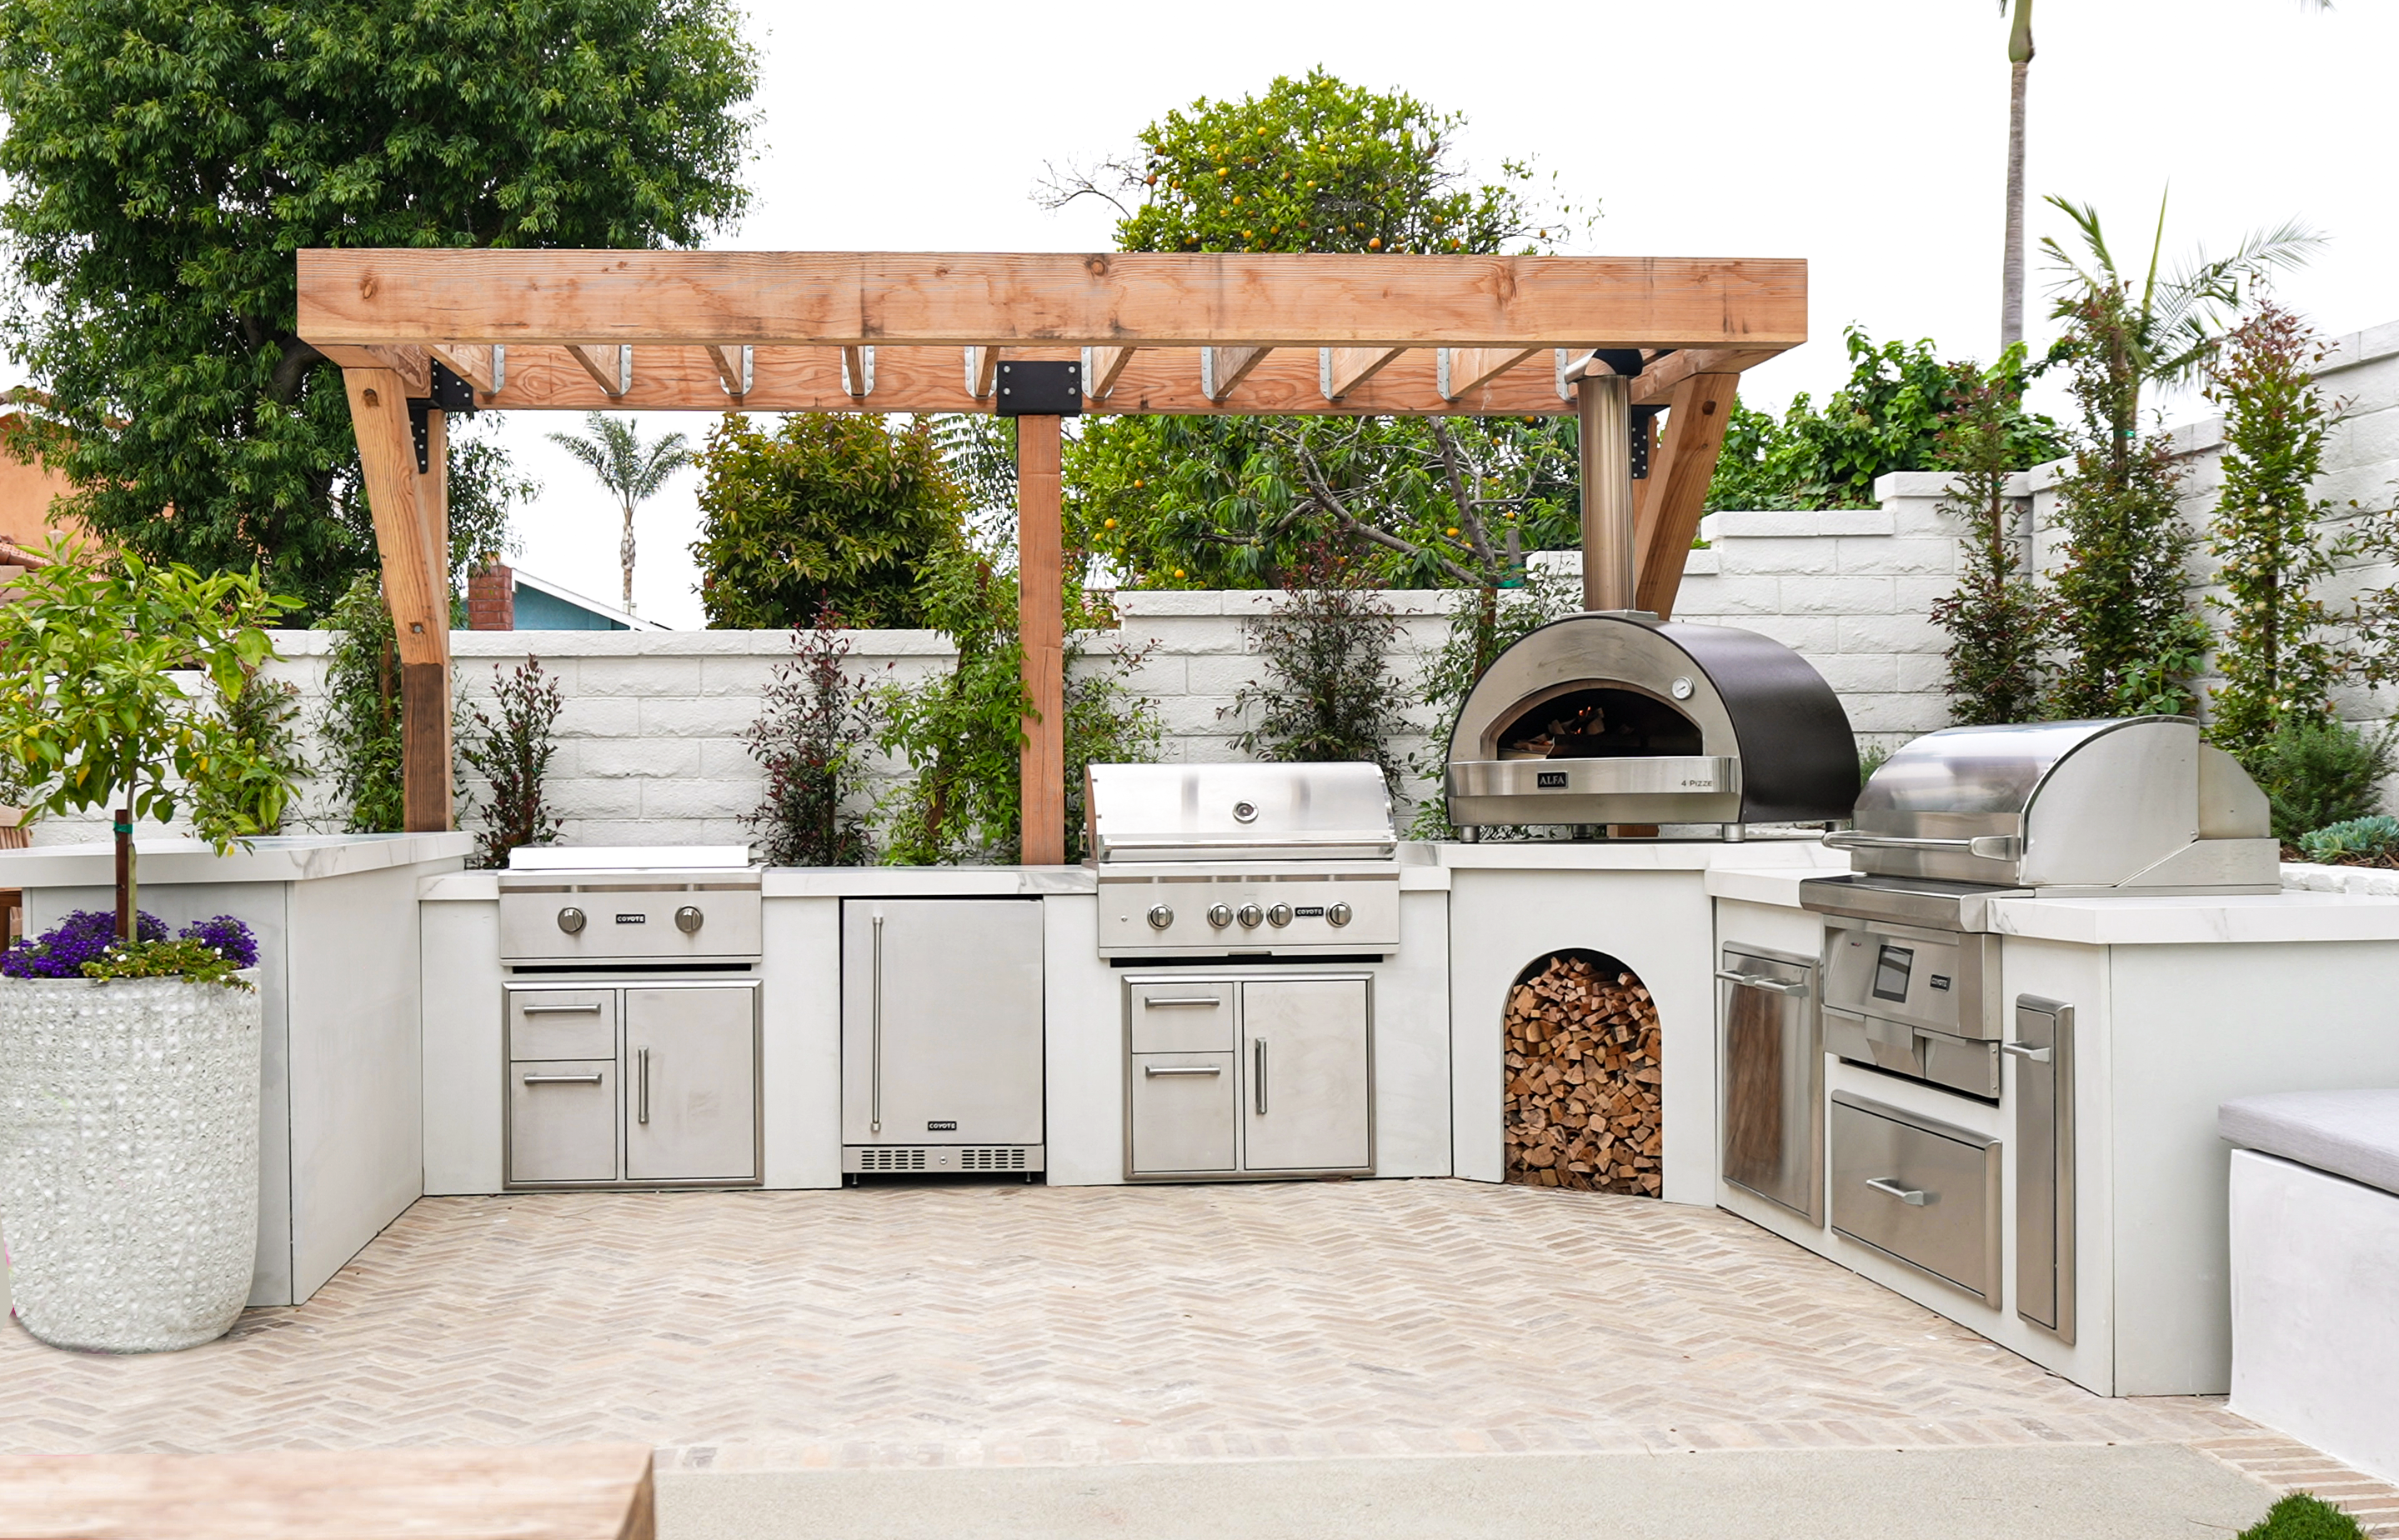
Phase 3: The Pizza Oven (aka the “heart of the operation” stage)
- Choosing the oven was tough. So many options! Wood-fired, gas-fired, brick, stainless steel… I ended up going with a wood-fired brick oven. It just felt right.
- Installing the oven was a two-person job, for sure. That thing was heavy! We used a forklift (borrowed from a friend, thankfully) to get it onto the base.
- Insulating around the oven. This is crucial for heat retention. I used a combination of ceramic fiber blanket and vermiculite. Hopefully it works!
Phase 4: The Finishing Touches (aka the “making it pretty” stage)
- Building the countertop. I used some nice-looking lumber and sealed it with a food-safe finish. Plenty of space for prepping pizzas.
- Adding storage. I built some cabinets underneath the countertop for storing wood, pizza peels, and other essentials.
- Tiling the backsplash. This was the fun part. I picked out some colorful tiles that matched my patio furniture.
- Hooking up the gas line for a side burner. Because sometimes you need to saute some veggies while the pizza’s cooking.
Phase 5: The Inaugural Pizza Party (aka the “it all paid off” stage)
- Firing up the oven for the first time was nerve-wracking. Would it work? Would it explode? Thankfully, it worked perfectly!
- Making the first pizza. Classic Margherita. Simple, but delicious. The crust was crispy, the cheese was bubbly, and the sauce was tangy.
- Sharing the pizza with friends and family. This was the best part. Everyone loved it!
So yeah, building an outdoor kitchen with a pizza oven was a ton of work, but totally worth it. Now I can make amazing pizzas in my backyard whenever I want. Next project… maybe a smoker?


