
Alright folks, grab a cuppa, ’cause today we’re tackling that all-too-familiar fridge mystery: the giant, congealed blob of leftover mac and cheese. Mine stared back at me this morning, kinda sad, kinda intimidating. I figured, instead of just nuking it into rubbery oblivion, why not jazz it up? Let’s turn last night’s comfort food into today’s star attraction.
Operation: Mac & Cheese Revival
First thing, I hauled that container out of the fridge. Man, it was solid. Like a cheesy brick. Needed a plan. I remembered some ideas floating around about leftover mac makeovers – something about baking it again with extras? Sounded worth a shot.
Raidin’ the Fridge
My targets:
- The Mac Brick: About 3 cups worth, cold and unyielding.
- Eggs: Grabbed a couple. I heard these help bind it when it bakes again? Makes sense.
- Milk: Splash of whole milk from the door. Gotta loosen up that cement, right?
- Spices: Found some garlic powder, onion powder, and a sad little pinch of paprika lurking in the spice rack.
- Extras (The Fun Part): Scrounged! Found half a cooked chicken breast, diced up small. A few sad broccoli florets leftover from stir-fry night, chopped fine. And hey, half a bell pepper needing love! Diced that too. For cheesiness, I always have shredded cheddar and some grated parm in the cheese drawer. Score.
Gettin’ Down to Business
Preheated my oven to 350°F. Figured slow and steady heat might revive things best. Pulled out a decent-sized baking dish – mine’s that trusty old ceramic one.
Now, tackling the mac brick. Scooped the cold, clumpy mac into a big mixing bowl. It looked… rough. Added the eggs and that splash of milk. Then, the real elbow grease started: gotta break up those clumps! Mushed it with a fork, squished it with my hands – whatever worked. Kept going until it wasn’t smooth, but at least it was kinda saucy and combined again.
Flavor time! Sprinkled in maybe a teaspoon of garlic powder, half teaspoon onion powder, and a smaller shake of paprika. Salt and pepper? Just a pinch – remember, the mac was already seasoned. Tossed in my chicken bits, chopped broccoli, and diced pepper.
The moment of truth: stirred it all together. Man, it looked better already! More color, more texture. Could almost pretend it wasn’t leftovers.
The Bake-Off
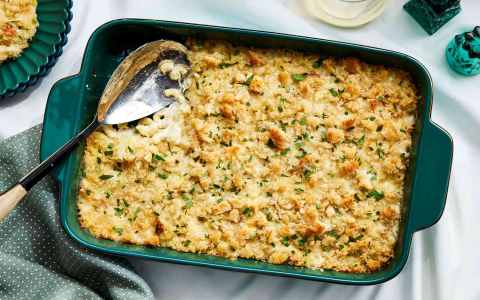
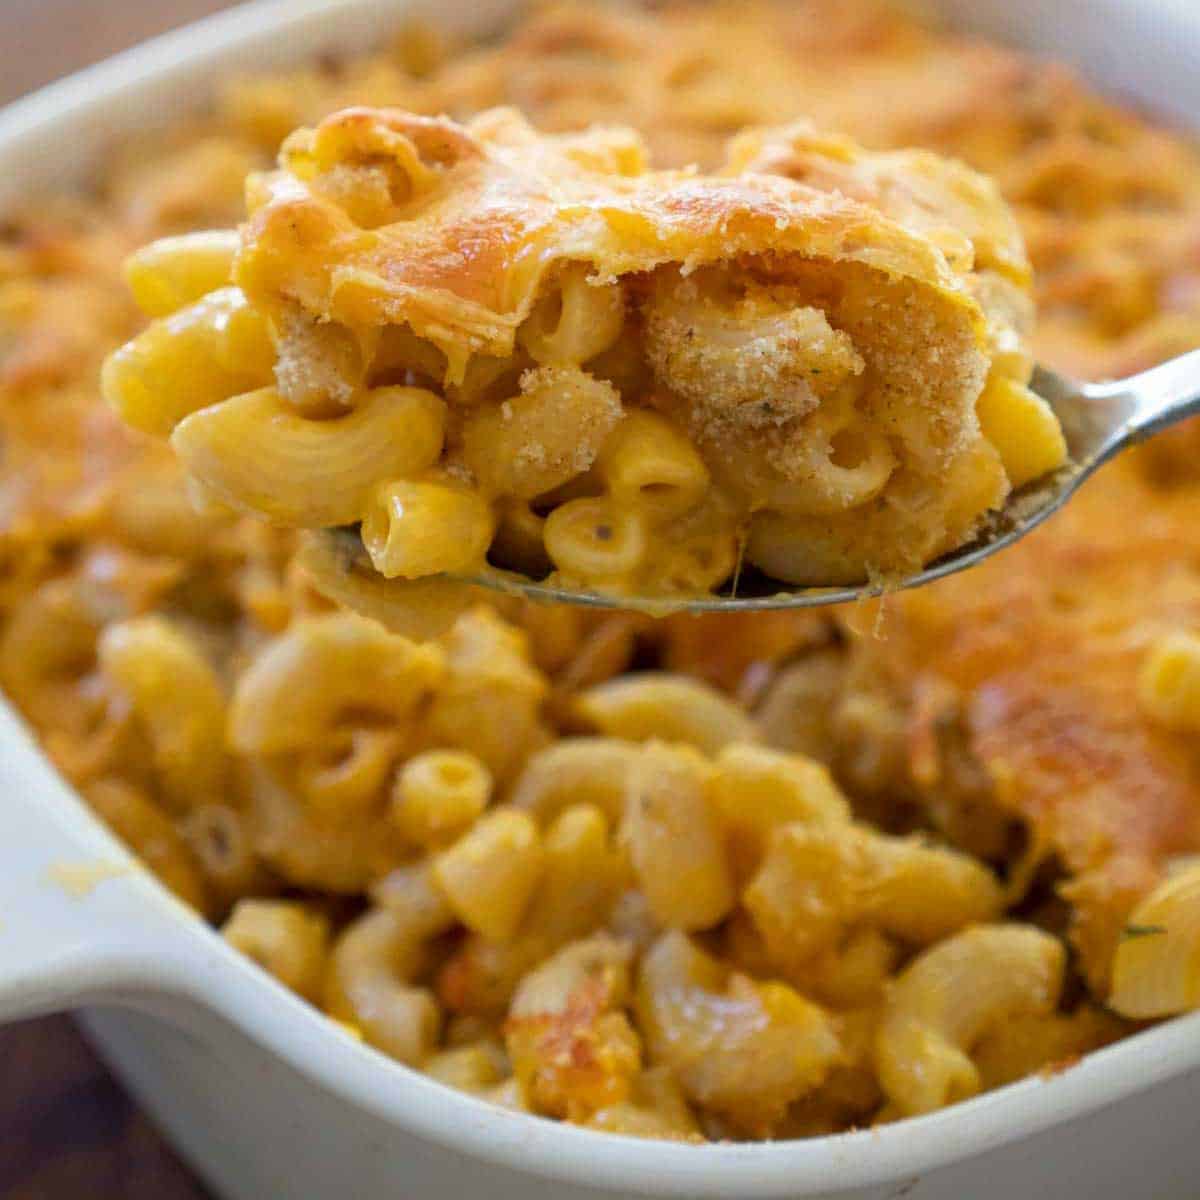
Dumped the whole mixture into that baking dish. Spread it out kinda evenly. Then, the pièce de résistance: the CHEESE TOPPING! Went heavy. Shredded cheddar all over the top, then a good layer of grated parmesan too. You gotta go generous here – it makes the crunchy, cheesy crust!
Popped that bad boy into the oven. Set the timer for… 25 minutes? Figured I’d check it then.
About 20 minutes in, I peaked. Oh yeah. It was bubbling around the edges, smelling fantastic. But the center still looked a bit wobbly. Gave it another 10 minutes. Total bake time: roughly 30-35 minutes. You want it piping hot all through and that cheese on top looking golden brown and slightly crispy in spots.
The Big Reveal (Taste Test!)
Pulled it out. Let it sit for maybe 5 minutes – way too hot and molten otherwise. Scooped a big spoonful.
Huge win! Completely different animal. Baking it gave it structure – kinda like a cheesy casserole, not a gloopy mess. The veggies and chicken added nice texture and flavor bursts. And that topping? THE TOPPING! Crunchy, cheesy, salty perfection. The eggs and milk totally worked. It held together beautifully, wasn’t dry, wasn’t soupy. Was it gourmet? Nah. But it was darn tasty and miles better than the sad lump I started with. Totally hit the spot for lunch.
My Takeaway: Don’t toss that leftover mac! With a few basic pantry/fridge staples and a little oven time, you can absolutely transform it. Toss in whatever cooked veggies, cooked meat, or extra cheese you have – it’s crazy flexible. Definitely adding this trick to my regular rotation for dealing with leftovers. Super easy, super satisfying.


