
My Messy Journey Updating That Ugly 90s Kitchen
Alright folks, grabbed my coffee this morning and just stared at my kitchen. That 90s vibe? It wasn’t cute nostalgia anymore, it was just… tired. Fluorescent light buzzing like angry bees, honey oak cabinets darker than my mood before coffee, and those little knob handles? Ugh. Time for a change, cheap and cheerful. Saw this idea online for a quick refresh and dove in headfirst. Here’s how it actually went down.
The Not-So-Simple Simple Tricks
Step 1: Busting The Big Light Box
First target: that giant, ugly fluorescent box in the middle of the ceiling. Total eyesore. Flipped the breaker switch – seriously, don’t skip this, zapping yourself is not a DIY trick anyone needs. Climbed up the wobbly ladder, screwdriver in hand. Expected maybe four screws? Nope. More like eight rusty ones holding that beast. Wrestling it down felt like wrestling a greased pig. Finally got it loose, almost dropped it on my head. Lesson learned: hold on tight.
Putting up the new LED ceiling fixture I bought wasn’t too bad actually. Wires matched up – black to black, white to white, bare wire to the green screw thing. Tightened everything down, clipped it into place. Flipped the breaker back on… and sweet, sweet victory! Instant bright, clean light. The biggest difference for almost no cash.
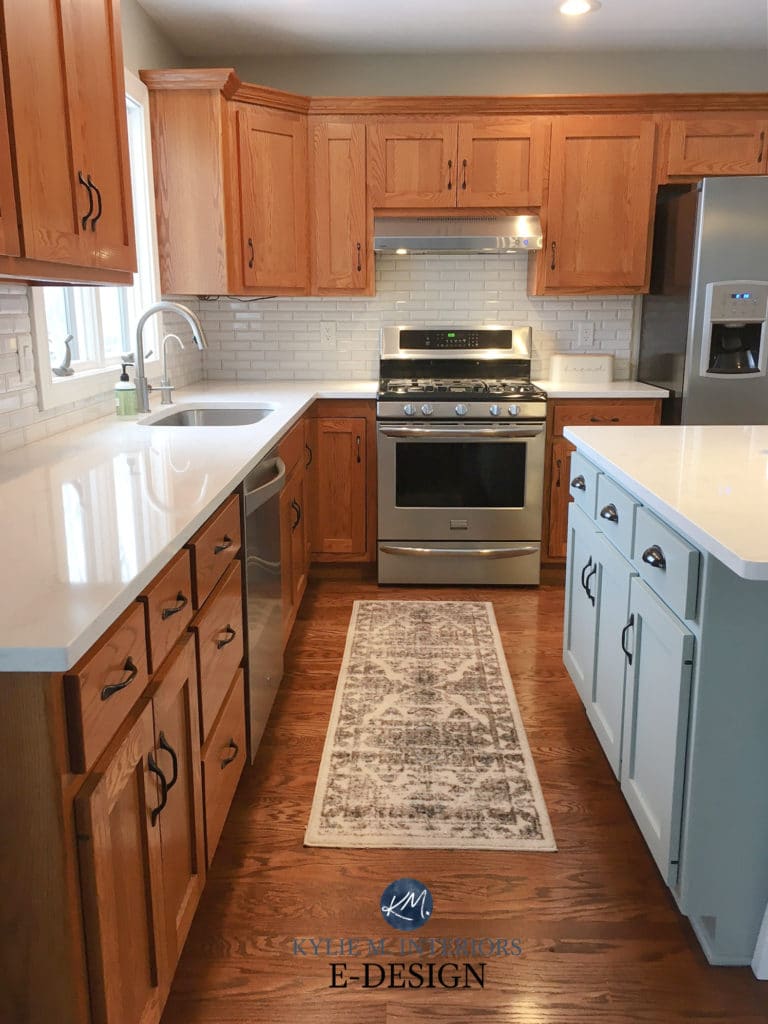
Step 2: Conquering The Honey Oak Cabinets
Okay, the cabinets. That warm honey oak had gone cold years ago. Time for paint. I knew the drill – clean ’em real good. Sugar soap spray everywhere, wiping off years of cooking grease and finger gunk. Felt like I needed a shower after. Sanding time… man, that dust gets everywhere. Mask up, goggles on, looked like an extra from a sci-fi movie. Sanded all the fronts just rough enough for paint to stick. Wiped down again, sticky tack cloth this time to grab the dust ghosts.
Painting primer was the easy bit. Then came the paint I picked out – a soft, clean cream colour. First coat? Looked terrible. Streaky mess. Panicked slightly. Second coat later that day, same thing. Nearly cried. Watched another quick video… apparently I was putting it on too thick. Doh! Thin coats, dummy! Third coat, super thin, and finally started looking decent. Thank goodness. Let those babies dry overnight, knobs off.
Step 3: Ditching The Sad Little Knobs
Last trick: new pulls. Honestly thought this would be the fastest. Pulled off all the old, tiny, brass knobs – easy peasy. Measured the distance between the screw holes for each door and drawer. Got a whole bag of sleek, brushed nickel bar pulls from the hardware store.
Screwing them in should have been simple, right? Wrong. Half of them went on fine, but then I hit a cabinet drawer where the old screws were weirdly long and the new holes didn’t quite line up perfectly. Had to drag out the drill, widen the hole just a smidge – scary stuff, one slip and ruined wood! Used my little screwdriver carefully for the rest. Finally got the last one in place. Whew.
Was It Worth The Sweat?
Honestly? Yeah, kinda blown away. That new light fixture makes the whole place feel 1000% brighter and cleaner. Painted cabinets look seriously fresh and modern. New hardware? Total game changer, looks way more expensive than it actually was. Three things, one messy weekend (seriously, the dust!), and my kitchen doesn’t look like a time capsule anymore. It ain’t perfect – look close and you might see a paint drip I missed – but who cares? Feels like a whole new space without ripping anything out. Totally recommend if you’re stuck with a tired 90s kitchen!


