
Alright, so I’m gonna tell you about this lazy susan kitchen table project I tackled. For a long time, reaching across our old kitchen table for, well, anything, was a real pain. You know how it is, someone asks for the salt, and it’s like a whole gymnastic routine. I’d seen those spinning contraptions in some restaurants and thought, “Hey, that doesn’t look too complicated.” Figured I’d give it a whirl myself. Why buy something new when you can just improve what you’ve got, or in this case, build something that does the trick?
First thing was figuring out the plan. Our existing table was okay, solid enough, but a bit of a plain Jane. I did think about just whacking a lazy susan mechanism onto it, but then a little voice said, “Go on, make something a bit more tailored.” Plus, it’s always a good excuse to mess about with some wood.
Gathering the Goods and Getting Started
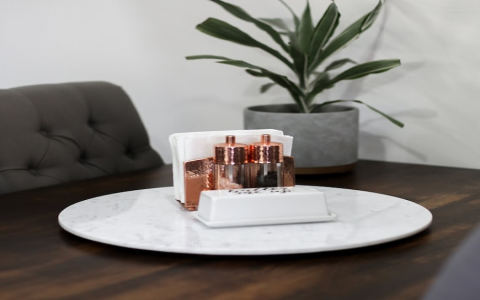
So, I headed down to the local hardware store. You know how those places are, you go in for one thing and come out with a cartful. I picked up some decent pine for the tabletop – nothing too fancy, but good enough to look presentable. And the main event, the lazy susan bearing itself. They had a few options, I just grabbed a sturdy looking one, about 10 inches I reckon. Seemed like it would hold up. Also grabbed a box of screws, some sandpaper, and a tin of varnish. My old tools in the shed were probably getting lonely anyway.
Here’s the basic list of what I ended up with:
- Some pine boards for the main table surface and the spinning part.
- One 10-inch lazy susan bearing.
- A mix of wood screws.
- Sandpaper – a couple of different grits.
- Wood glue, the good stuff.
- A tin of clear varnish.
- And, critically, a big mug of tea to keep me going.
Back in my workshop, which is really just a corner of the garage, I got things cleared out. First job was cutting the wood. I decided on a round top for the spinner, and I was going to use our existing square kitchen table as the base. Saves a bit of work, right? My design sketches were pretty much just circles drawn on the back of an envelope, if I’m being honest. Very technical.
The Nitty-Gritty: Sawdust and Assembly
Okay, so the base table was already there, a simple square thing. Good. I focused on the spinning top. I cut out a circle from a nice piece of pine, about 20 inches across. Took my time with the jigsaw to get it reasonably round. Then, a lot of sanding. Edges, top, bottom – wanted it smooth so no one got splinters with their dinner.
Then, the slightly more fiddly bit: attaching the lazy susan mechanism. I found the center of my pine circle, marked it. Then I flipped the circle over and centered the bearing on it. Screwed one side of the bearing to the underside of my new pine circle. Easy enough.
Next, I had to attach this whole assembly to the existing kitchen table. I carefully found the center of our square kitchen table. This took a bit of measuring to make sure it wasn’t off-kilter. Once I was happy with the center point on the main table, I placed the pine circle (with the bearing already attached to its underside) onto the main table, making sure the other side of the bearing was now resting on the main table. Then, very carefully, I drove screws up from underneath the main tabletop into the free side of the lazy susan bearing. This was a bit awkward, lying on my back under the table, but it meant no screws showing on the top of the main table. And then, the pine circle could spin freely on the bearing, which was now fixed between the main table and the spinning top.
A key step was making sure everything was level. I didn’t want a wonky spinner. So, lots of checking with a spirit level as I went.

The Big Test and Final Touches
Once it was all screwed together, I gave the new pine spinning top a couple of coats of food-safe varnish. Had to let it dry properly between coats, of course. This protects the wood and makes it easy to wipe down after meals.
And then, the big moment. I gave it a gentle push. And it spun! Smoothly too! No scraping, no major wobbles. I tell you, there’s a certain satisfaction in making something with your own hands that actually works the way you want it to.
Now, passing the ketchup, or the bowl of spuds, is no effort at all. Just a little nudge and round it goes. The family actually likes it, which is always a bonus. My youngest thinks it’s a fairground ride for his toy cars when we’re not eating.
It was a decent weekend’s work. A bit of measuring, a bit of cutting, a fair bit of sanding. But definitely worth the effort. Sometimes it’s these little practical things that make daily life a bit easier. And honestly, if you’re thinking about a project like this, I’d say have a go. It’s not as daunting as it might seem. Just take it step by step. You learn a lot just by doing.


